Adding chlorine is straightforward: test the water, dose the right product after sundown, and let the pump run long enough to mix it in.
Whether you choose tablets, liquid, or granules, understanding how each type behaves in your specific situation makes all the difference. Get these timing, dosing, and distribution details right, and you’ll make every drop count and avoid headaches down the line.
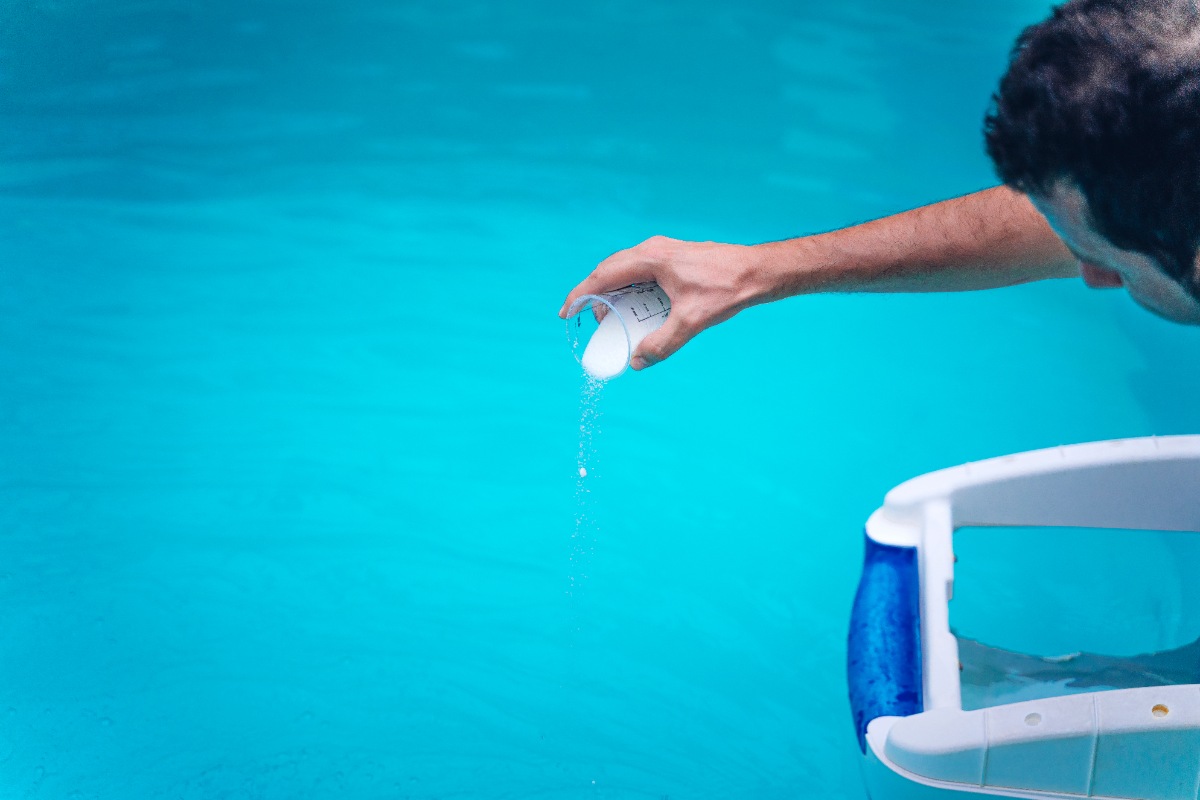
How to Add Chlorine Tablets to Your Pool

| Project Difficulty: Beginner Estimated Time: 15–20 minutes for initial setup/refill Project Cost: $80–$140 for a 25 lb. bucket (Approx. 50 tabs) |
Chlorine tablets are arguably the most popular choice for routine pool maintenance.
Step-by-Step Method
- Pick your dispenser: You have two options:
- Floating dispenser: This is the cheap and easy route because you just load it up and let it bob around. The only issue is that these can get stuck in a corner or rest against a vinyl liner, potentially bleaching it.
- Automatic chlorinator: It’s a small device plumbed right into your pool’s return line. Fill it with tablets, set the dial, and it will deliver a consistent dose of chlorine.
- Find the no. of tablets: The label is your guide here. Usually, you’ll need about one 3-inch tablet for every 5,000 to 10,000 gallons of water per week, but this needs to be adjusted based on sunlight and how often the pool is being used.
- Load the dispenser: With gloves and goggles on, place the tablets in the chlorinator. It’s best to start with the dial on a medium setting and adjust from there.
- Monitor and adjust: Based on test results, the dial on the chlorinator can be tweaked to keep that free chlorine level right where you want it.
How to Add Liquid Chlorine to Your Pool
| Project Difficulty: Beginner Estimated Time: 20–30 minutes per application Project Cost: $20–$35 for a case of four 1-gallon jugs |
When a fast, effective dose of chlorine is needed, liquid is the answer. It’s cheap, it’s powerful, and it gets to work instantly.
Step-by-Step Method
- Do the math: Use a pool calculator app or refer to the product label to figure out exactly how much liquid chlorine is needed to hit the target free chlorine level.
- Get the pump running: Always make sure the pump is on to get the water circulating and get an even distribution.
- Pour it: With safety gear on, slowly pour the measured amount into the deep end. A good technique is to walk around the edge of the pool, pouring a slow, steady stream in front of one of the return jets to help it mix in. Be careful not to splash it on yourself or the deck.
How to Add Granular Chlorine to Your Pool

| Project Difficulty: Intermediate Estimated Time: 30–40 minutes (including pre-dissolving) Project Cost: $150–$200 for a 25 lb. bucket |
Granular chlorine, especially Cal-Hypo, is the king of shocking. As Yamaguchi confirms, “One of the best methods for raising free chlorine quickly is with a calcium hypochlorite chlorine shock treatment.” It’s what’s used to fight off the first signs of algae, clear up cloudy water, or reset things after a big pool party.
If you’re wondering about the specifics, we have a great article that explains Shock vs. Chlorine: What’s the Difference?
Step-by-Step Method
- Pick the granules:
- Calcium Hypochlorite (Cal-Hypo): This is the classic pool shock. It’s unstabilized (no CYA), but it will add a little calcium to your water over time.
- Dichlor: This one is stabilized, so it adds CYA. This one should be used carefully, especially with tablets, to avoid sending CYA levels through the roof.
- Measure your dose: Read the label carefully to figure out how much is needed to get the chlorine level where you want it.
- Pre-dissolve (this is a must): Never just toss granular chlorine into your pool. The little granules can sink and bleach or even eat away at your pool liner or plaster. Here’s the safe method:
- Fill a clean, 5-gallon bucket about three-quarters full with warm pool water.
- Wearing PPE, slowly add the granules to the water (not the other way around!).
- Stir with a dedicated paint stirrer until every last bit is dissolved.
- Broadcast the mix: With the pump running, walk around the edge of the pool and slowly pour the dissolved mixture into the water, which helps it spread out evenly.
Basic Chlorine Dosage Guidelines
Before you can add any chlorine, you need to lay the groundwork for an accurate dose.
Test Your Water First
Before doing anything, test the water for the following:
- Free Chlorine (FC): 1–3 ppm
- pH: 7.2–7.6
- Total Alkalinity (TA): 80–120 ppm
- Cyanuric Acid (CYA): 30–50 ppm (salt pools: 60–80 ppm)
Know Your Pool’s Volume
You must know how many gallons your pool holds to dose it correctly. If you’re not sure, here are the standard formulas:
- Rectangular pools: Length (ft) x Width (ft) x Average Depth (ft) x 7.5 = Volume in Gallons
- Circular pools: Diameter (ft) x Diameter (ft) x Average Depth (ft) x 5.9 = Volume in Gallons
Determine the Right Amount
You can determine the correct dosage once you know your starting levels and your pool’s volume. Always read and follow the product label for specific instructions. The goal is a steady, consistent level of free chlorine.
For a pro’s take on this, we turn to Jeremy Yamaguchi, CEO of Cabana. He says, “From my experience, I find that the most ideal range is between 2-3 ppm, though you’re also usually okay to go down to 1 ppm or up to 4 ppm.”
| Type | 15,000-Gallon Pool | 25,000-Gallon Pool | 30,000-Gallon Pool |
| Trichlor Tablets | 3 tablets | 5 tablets | 6 tablets |
| Liquid Chlorine | 1.5 gallons | 2.5 gallons | 3 gallons |
| Cal-Hypo Granular | 1.5 oz (routine) / 4.5 oz (shock) | 2.5 oz / 7.5 oz | 3 oz / 9 oz |
| Dichlor Granular | 1.5 oz (routine) / 4.5 oz (shock) | 3 oz / 7.5 oz | 4.5 oz / 13.5 oz |
Remember, these figures are general guidelines. Always consult the specific product’s label for the most accurate dosage instructions for your pool.
Read more: How Often to Add Chlorine to Your Pool
Best Practices for Any Method

If you nail the when and how, everyday pool chemistry gets easier, cheaper, and a lot safer. Here are the best practices:
Safety First
It can’t be stressed enough: you’re dealing with powerful chemicals. Mishandling them is no joke and leads to about 4,500 emergency room visits in the U.S. each year, according to the CDC.
- Gear up: Never handle chemicals without safety goggles and a pair of chemical-resistant gloves. Long sleeves are a good idea, too.
- Read the Label. Every. Single. Time: Formulations can change. Always read the directions and safety warnings before opening anything.
- Get some air: Always work in a well-ventilated space.
- The golden rule: NEVER add water to chemicals. It can cause a violent, splashing reaction. Always, always add the chemical to a large bucket of water.
- Store it right: All chemicals should be in their original containers, sealed tightly, in a cool, dry spot, locked away from kids and pets.
Timing Is Everything
Add chlorine (or shock) after the sun is off the pool. UV light can slash unstabilized chlorine by more than half in just a couple of hours, so dosing at night lets every molecule work on germs instead of getting cooked off.
Let It Circulate
Chemicals don’t mix themselves. Run the pump a solid 8 hours, or longer if you’ve hit the pool with a heavy shock to push treated water through every corner and avoid pockets of super-high chlorine. Bonus: night-time circulation can save on off-peak power rates.
The “Can We Swim Yet?” Question
This is a common question, and the answer depends on what was added.
- Routine dose: When free chlorine drifts back to the everyday sweet spot of 1–4 ppm, you’re good to dive in. With the pump running, this usually only takes a few hours.
- Shock: Super-chlorination can spike levels to 10 ppm or higher. Wait until testing shows you’re back in that 1 to 4 ppm window. Plan on 12–24 hours (sometimes longer), depending on how hard you blasted the water.
If you need to speed up the process, you can read our guide on How to Lower Chlorine Levels in Your Pool.
Troubleshooting Common Issues
Eventually, every pool owner runs into frustrating problems. Here are the most common ones and how to fix them.
Problem 1: “Why is my pool still cloudy when the numbers look fine?”
Cloudiness almost always comes down to filtration or circulation, not a single magic chemical. Run time that’s too short, a dirty or undersized filter, high pH, or lingering combined chlorine can all let micro-particles hang in suspension.
Fix: Crank the pump to 24 hours, backwash or deep-clean the filter, then hit the water with a clarifier, backwash or deep-clean the filter, then hit the water with a clarifier or floc only if it’s still hazy after good filtration.
Problem 2: “Help, my pool went green overnight!”
That pea-soup tint is living algae feasting on too-low free chlorine, often after a hot day, rainstorm, or missed pump cycle.
Fix: Do a full-bore SLAM (shock level and maintain). Raise chlorine to shock level for your CYA, brush hard, keep the filter running, and hold that level until the water is clear and overnight loss is <1 ppm.
If you find your levels are consistently low, check out our guide on How to Increase Free Chlorine in Your Pool.
Problem 3: “I keep adding chlorine, but my reading is zero.”
- Something is eating the chlorine. This is what pros call a high “chlorine demand.” It could be a hidden patch of algae, a pile of leaves not seen at the bottom, or high phosphates acting as algae food.
- Chlorine lock: This is the other possibility. The CYA level has crept up way too high (over 100 ppm), and it’s strangling the chlorine.
FAQs About Adding Chlorine to Your Pool
Can you mix different types of chlorine?
Never mix different types of chlorine products. It is incredibly dangerous. Mixing different chlorine products can cause a violent chemical reaction, fire, or explosion.
This video does a great job of showing the aftermath. It’s a bit old, but the risk is still very real:
Do you need to run the pump after adding chlorine?
Yes, always. Run it for at least 4 to 8 hours after adding any chemical. It’s the only way to make sure it’s mixed in evenly and safely.
How long should you wait after adding chlorine to your pool?
For a regular dose, wait until your test kit confirms the free chlorine is back in the 1–4 ppm safe range. After a shock treatment, you must wait until that super-high level drops back down into that same range, which can easily take a day or more.
Can you add chlorine to a saltwater pool?
Yes, and sometimes you have to. A saltwater pool is still a chlorine pool. It just has a salt chlorine generator that makes its own chlorine from salt, but these machines work slowly. After a big pool party or if the water gets too cold for the generator to work (usually below 60°F), you have to manually add some liquid chlorine or granular shock to keep things sanitized.
Clear Water, Confident Care
A well-timed dose, good water circulation, and routine testing will carry most pools through the season, but chemistry quirks and equipment surprises still crop up.
If you’d rather spend more time enjoying your pool than maintaining it, we can connect you with an experienced pool pro in your area who can handle the chemistry for you, ensuring your pool is always swim-ready.
Home Gnome delivers the best home service experience at the click of a button. Book reliable, skilled services in seconds and leave the rest to us.
Main Image: Person chlorinating pool. Photo Credit: Cavan / Adobe Stock

")


